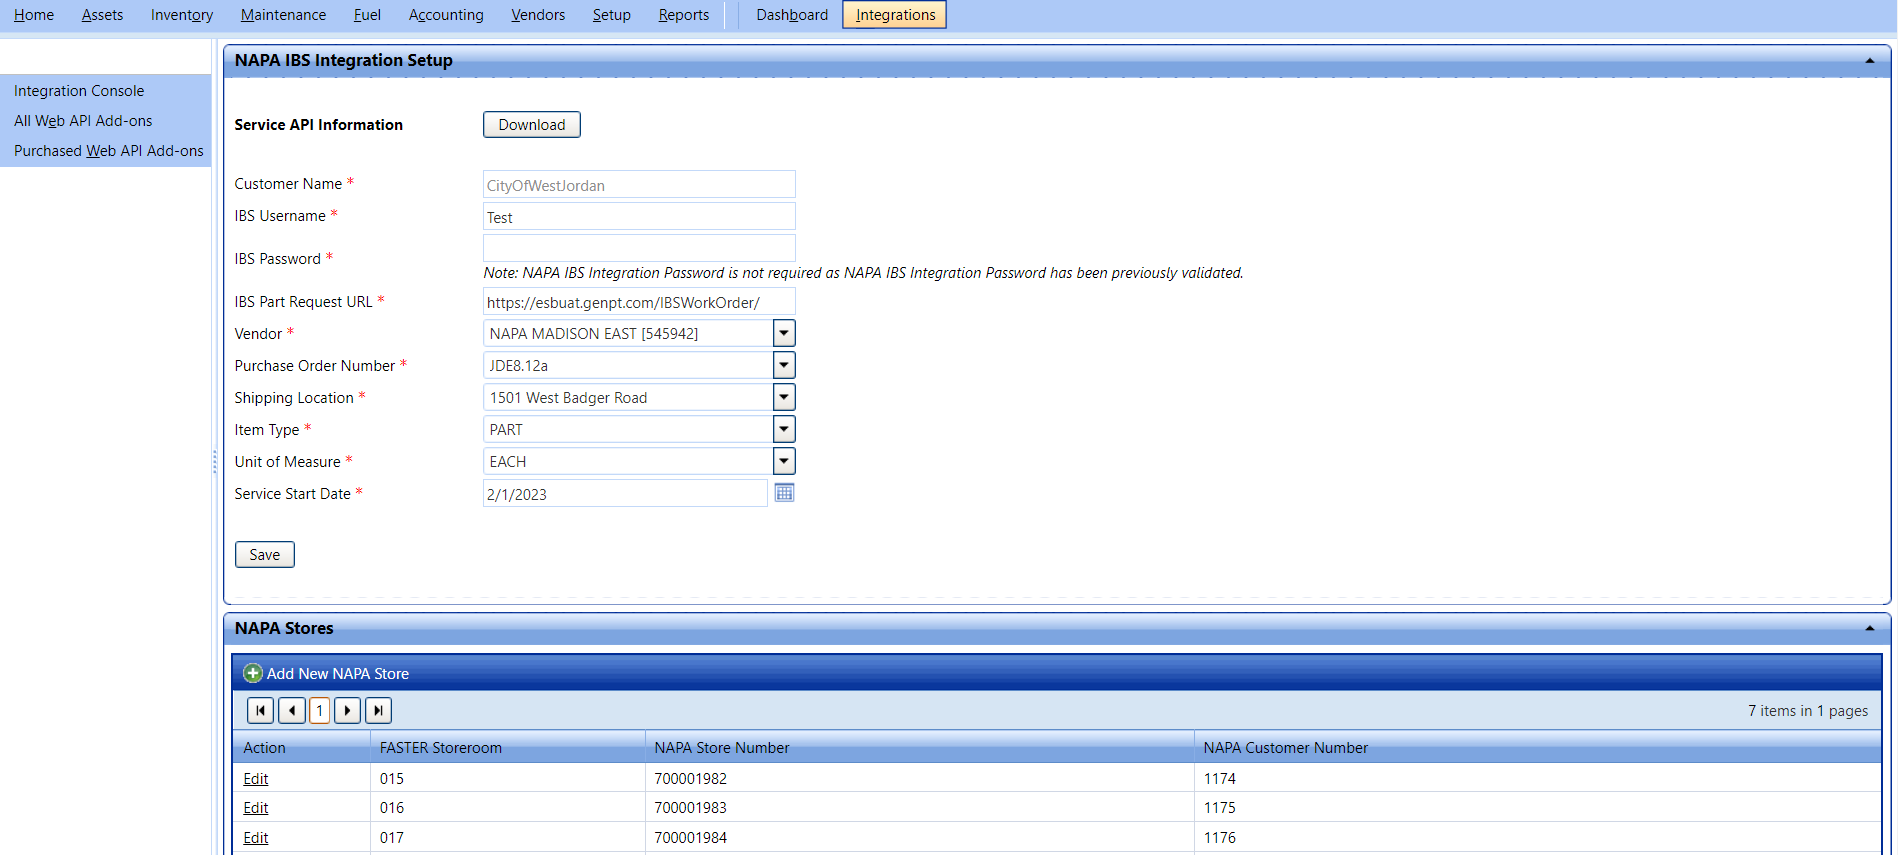
For the NAPA IBS to successfully connect and import the data or to share inventory details with the FASTER Web, you must first set up the connection in the NAPA IBS Integration Setup page.
NAPA IBS Setup
1. In the Customer Name box, type the name of the customer.
2. In the IBS Username box, type the username.
3. In the IBS Password box, type the password.
4. In the IBS Part Request Url box, type the part request url.
Note: The IBS Username, Password, and the Part request url will be provided by NAPA.
5. In the Vendor drop-down list, select the Vendor name.
6. In the Purchase Order Number drop-down list, select the purchase order number.
7. In the Shipping Location drop-down list, select the shipping location.
8. In the Item Type drop-down list, select the item type.
9. In the Unit Of Measure drop-down list, select the unit.
10. In the Service Start Date field, select the date.
11. Click Save Configuration.
After the configuration is saved, the Service status will be active, and the Service API tokens and endpoints are to be provided to NAPA by FASTER.
After the integration, NAPA is added to the FASTER Web and can be used to communicate and send real time inventory updates.
After configuring the NAPA Integration, add a NAPA store. In the NAPA IBS Integration Setup, under NAPA Stores section, click Add NAPA Store.
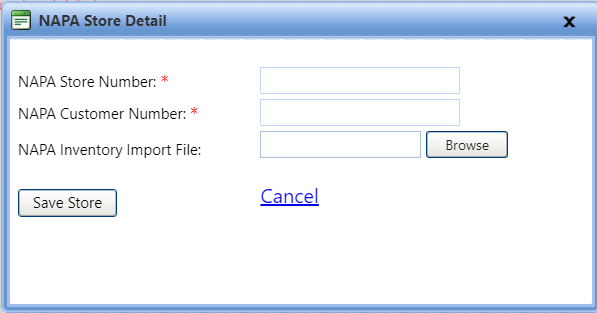
1. In the NAPA Store Number box, type the NAPA Store Number provided by NAPA.
2. In the NAPA Customer Number box, type the NAPA Customer Number provided by NAPA.
3. In the NAPA Inventory Import File, click Browse to select the Inventory Import file provided by NAPA.
For each input file a specific store will be created in FASTER Web.