Tip
TipYou can search for the existing task lists based on the search options available in the Advanced Search Options - Task List section. You can perform the actions such as modify, duplicate, delete, or obsolete the existing task lists.
Tip
To view the Advanced Search Options - Task List page, click the Advanced Search Options - Task List link.
1. Click the Maintenance module.
2. In the Actions section, click Manage Task List.
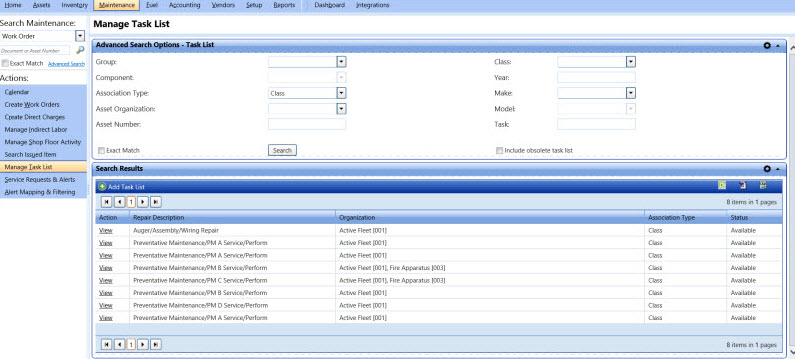
3. In the Advanced Search Options - Task List section, specify the following search parameters:
a. In the Group list, select a repair group.
b. In the Component list, select the repair component.
c. In the Association Type list, select the association type as asset number, year-make-model, or class.
d. In the Asset Organization list, select the asset organization.
e. In the Asset Number box, type the asset number.
f. In the Class list, select the class of asset.
g. In the Year box, type the manufacturing year of asset.
h. In the Make list, select the make of asset.
i. In the Model list, select the model of asset.
j. In the Task box, type a brief about the task list you want to search.
k. Optionally, if you know the exact asset number, select the Exact Match check box to exactly match the search result with the search parameters.
l. Optionally, select the Include obsolete task list check box to include the obsoleted task list in search results.
4. Click Search.
The Search Results grid displays the task list searched based on the search parameter with the following information for each task list:
o Repair Description
o Organization
o Association Type
o Status
5. In the Action column, click View next to the task list you want to view.
|
Navigation Tips:
|
You can export the Search Results grid in the following formats:
· Microsoft Excel (.xlsx)
· Microsoft Word (.docx)
· Comma-Separated Values (.csv)
1. Click the Microsoft Excel ( ![]() ), Microsoft Word (
), Microsoft Word (  ), or Comma-Separate Value (
  ) icon in the upper-right corner of the Search Results grid.
The File Download dialog box opens prompting you to Open, Save, or Cancel.
2. Click Save.
The Save As dialog box is displayed with the File Type of the selected format.
3. Browse to the desired location, specify a file name, and then click Save.
The Search Results grid is saved in the specified format at the specified location.