Scheduled Reports
The Scheduled Reports section helps you:
- To save report parameters, to open any report in FASTER (Standard, Add On or Custom), set the parameters they want, and be able to save that report under their user name to reuse at a later date.
- To schedule report execution of a saved report at a later date/time. That scheduled run should allow for a regular frequency (daily/weekly/monthly at X date/time) or a custom date/time of their choosing.
 Tip
Tip
To view the Scheduled Reports page, click the Scheduled Reports link.
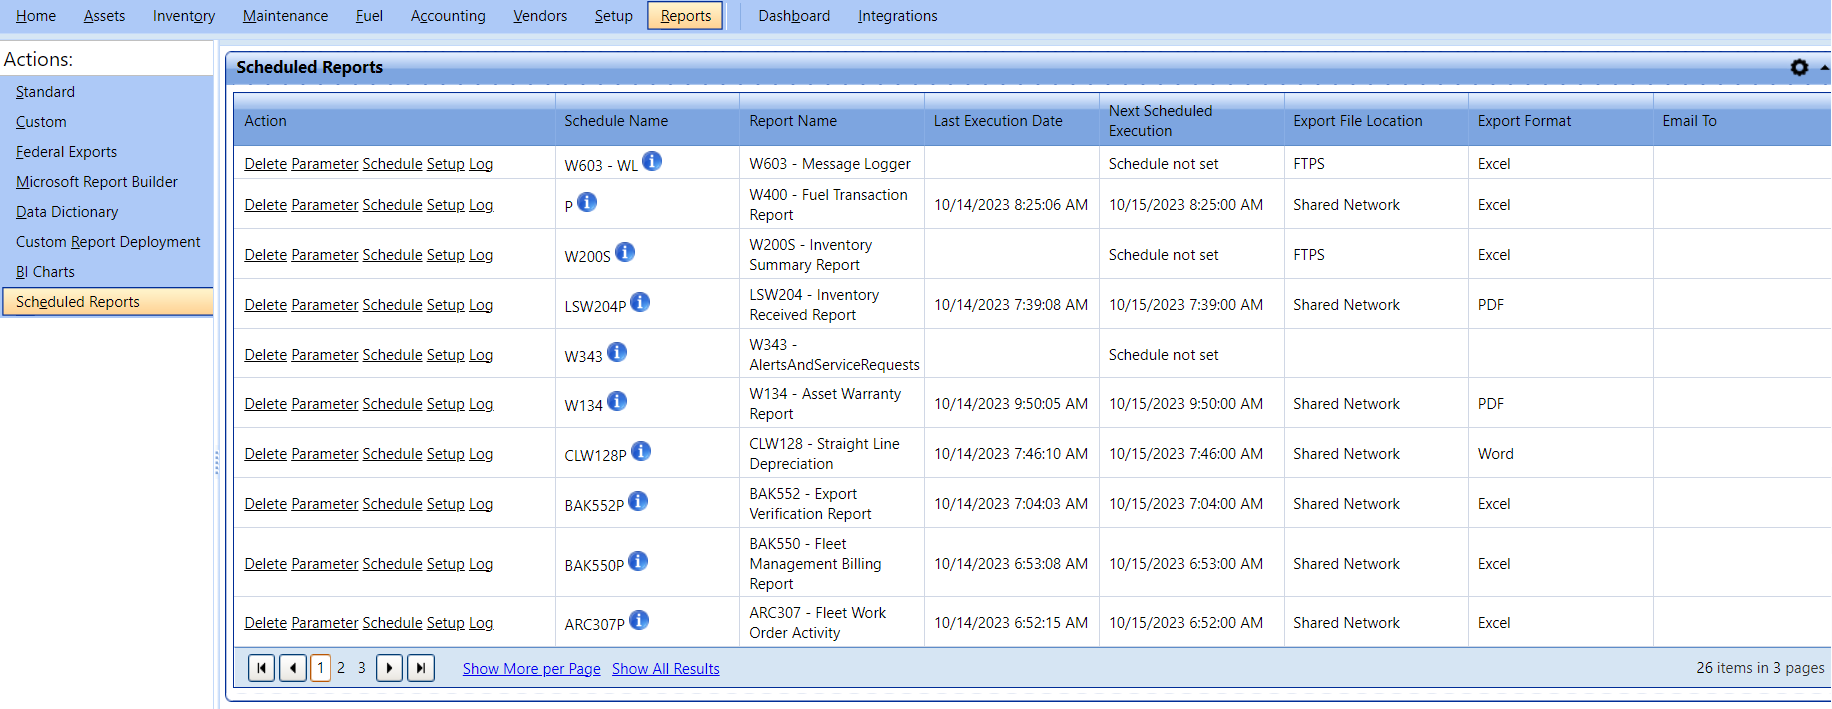
Scheduled Reports
Creating Scheduled Report
The Report can be scheduled while you generate a report.
To create a scheduled report
-
Click the Reports tab.
The Standard window opens.
- Open any report, select the required parameters, and click View Report.
The report will be generated.
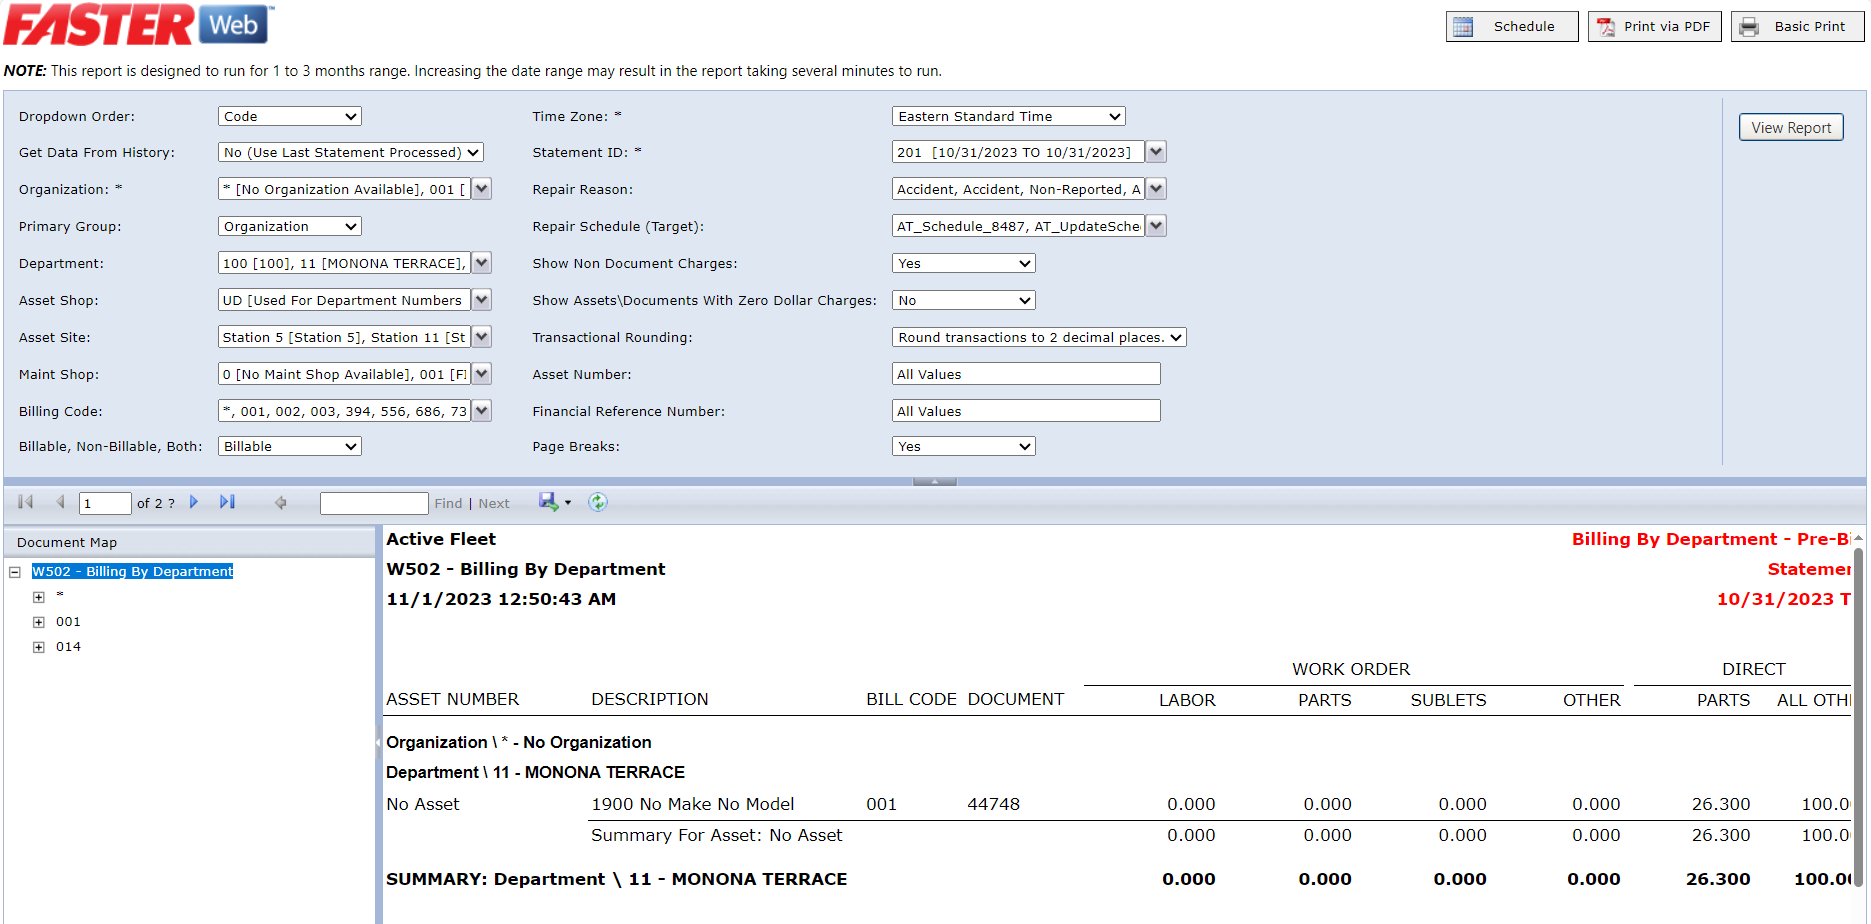
- Click the Schedule button on the top.
The Create Report Scheduler dialog box opens.
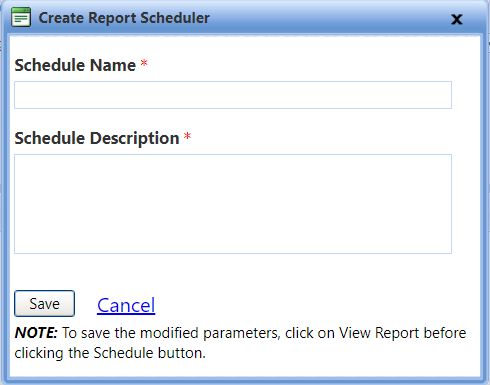
- In the Create Report Scheduler dialog box, provide the following:
- Schedule Name - Provide the name of the schedule.
- Schedule Description - Provide the description of the schedule.
-
When finished, click one of the following:
- Save to save the information and close the dialog box.
- Cancel to disregard any changes and close the dialog box.
Deleting Scheduled Report
The Scheduled Report can be deleted as per the requirement.
To delete a scheduled report
-
Click the Reports tab.
The Standard window opens.
- In the Actions menu, click Scheduled Reports.
The Scheduled Reports page opens.
- Click the Delete link in the Actions.
The Confirm Delete Schedule dialog box opens.
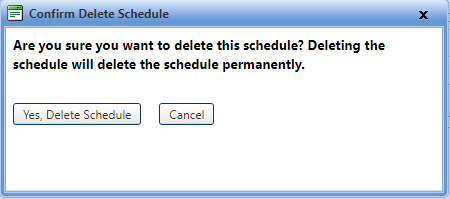
- In the Confirm Delete Schedule dialog box, click one of the following:
o Yes, Delete Schedule to confirm deletion.
o Cancel to close the dialog box.
Setting Parameters
The parameters can be set for a report as per the requirement before scheduling the report.
To set parameters for a report
- Click the Reports tab.
The Standard window opens.
- In the Actions menu, click Scheduled Reports.
The Scheduled Reports page opens.
- Click the Parameter link in the Actions.
The Report Viewer page opens.
- On the Report Viewer page report parameters will be pre-populated and schedule button will be available.
Note: To save the modified parameters, click on View Report before clicking the Schedule button.
- Click Schedule to save the report schedule.
The Edit Schedule window opens.
o Type name of the schedule in the Schedule Name box.
o Type description of the schedule in the Schedule Description box.
o Click Save to save the Schedule details.
o Click Cancel to close the window.
- Click Print Via PDF to print the report in PDF format.
- Click Basic Print to print the report in a basic format.
Scheduling Report
The parameters can be set for a report as per the requirement before scheduling the report.
To schedule a report
- Click the Reports tab.
The Standard window opens.
- In the Actions menu, click Scheduled Reports.
The Scheduled Reports page opens.
- Click the Schedule link in the Actions.
The Create Schedule window opens.
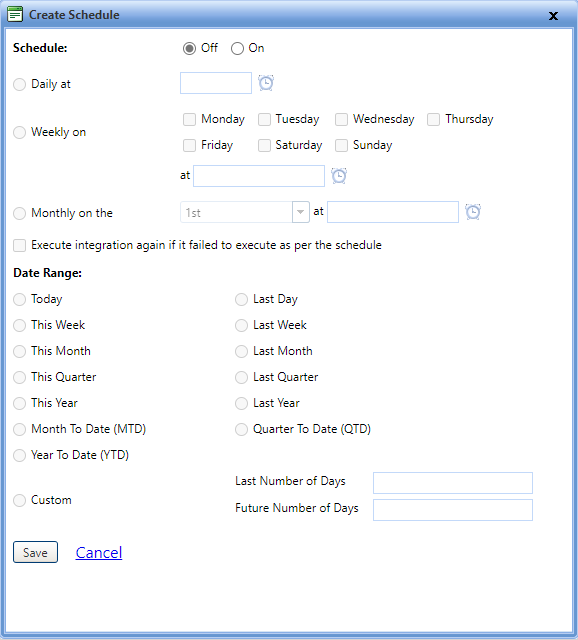
-
In the Create Schedule page, select On to enable the settings.
-
To schedule the report on daily basis, select the time from the time picker in the Daily at field to set the report schedule time.
-
To schedule the report on weekly basis, select a specific day or more than a day in the Weekly on field and time in the at field.
-
To schedule the report on monthly basis, in the Monthly on field, select the day from the drop down and time from the time picker.
-
Select the Execute integration again if it failed to execute as per the schedule, to try execute the integration again if it failed.
-
Select the Date Range by selecting the following options:
- Today: This option will export the data from the current day.
- Last Day: This option will export the data of the previous day.
- This Week: This option will export the data from the current week, usually starting from Sunday or Monday.
- Last Week: This option will export the data of the previous week.
- This Month: This option will export the data from the current month.
- Last Month: This option will export the data from the previous month.
- This Quarter: This option will export the data from the current quarter of the year.
- Last Quarter: This option will export the data of the quarter immediately preceding the current quarter.
- This Year: This option will export the data from the current calendar year.
- Last Year: This option will export the data of the calendar year immediately preceding the current year.
- Month to Date (MTD): This option will export the data including all dates from the beginning of the current month up to the current date.
- Quarter to Date (QTD): This option will export the data including all dates from the beginning of the current quarter up to the current date.
- Year to Date (YTD): This option will export the data including all dates from the beginning of the current year up to the current date.
- If the scheduled report does not have start date and end date, then date range need not be selected.
- If the scheduled report have a start date and end date, and date range is selected (recommended), then the report will be exported accordingly.
- If the scheduled report does not have a selected date range, start date and end date selected in report parameters will be used for data retrieval. In this case, same report will be generated every time when the report is exported.
- Select Custom if you want to select a custom date range by typing Last Number of Days and Future Number of Days.
- When finished, click one of the following:
- Save to save the information and close the dialog box.
- Cancel to disregard any changes and close the dialog box.
- Click the Reports tab.
- In the Actions menu, click Scheduled Reports.
- Click the Setup link in the Actions.
-
Select the type of setup: Email, Export, or Both.
-
Email - Selected by default. Only email related setting will be available and required.
-
Export - Only export related setting will be available and required.
- Both - Both email and export setting are available and required.
-
In the Export File Type drop down, select the type of format for export. The formats available are Excel, PDF, and Word.
-
In the Export File Location drop down, select the location for export.
-
If Shared Network is selected, type the Network Location Path where the export file is to be saved.
-
IF SFTPor FTPS is selected, type the following details:
-
Server Host Name/IP Address: Type the host name or IP address of the server.
-
SFTP Server Username: Type the username of the SFTP server.
-
SFTP Server Password: Type the password of the SFTP server.
-
SFTP Server Port: Type the port of the SFTP server.
-
SFTP Directory Location: Type the directory location of the SFTP server.
-
-
In the Email From box, type the email address of the sender.
-
In the Email To box, type the email address of the receiver.
-
When finished, click one of the following:
- Save to save the information and close the dialog box.
- Cancel to disregard any changes and close the dialog box.
- Click the Reports tab.
- In the Actions menu, click Scheduled Reports.
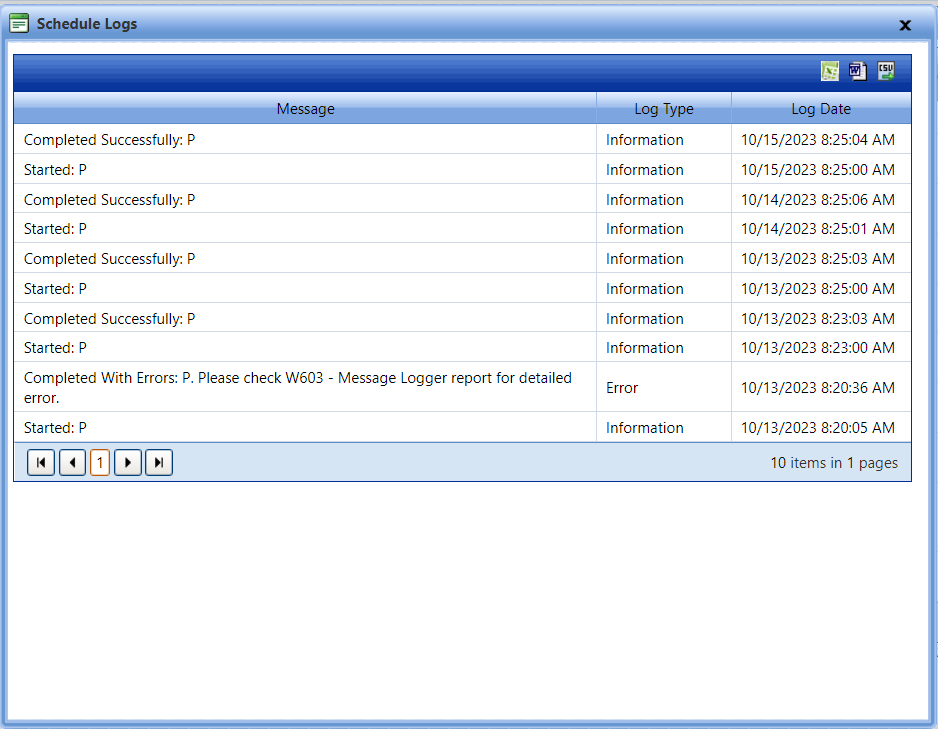
- Click the Log link in the Actions.
- The Schedule Logs displays the Report Schedule logs with Message, Log Type, and Log Date.
|
Note: Date range selection will be optional, |
The scheduled report can be edited. If the report is already scheduled, click on the Schedule link in actions for that report to edit the schedule.
Setup Report Configuration
The option helps to configure export and mail related settings for a report.
To setup a report
The Standard window opens.
The Scheduled Reports page opens.
The Edit Setup window opens.
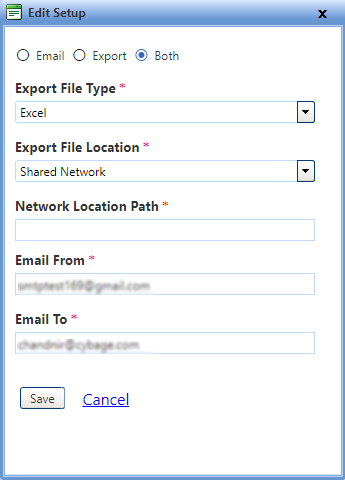
Note: Email To field supports multiple values separated with comma.
Viewing Report Schedule Logs
The option helps to configure export and mail related settings for a report.
To view a report schedule log
The Standard window opens.
The Scheduled Reports page opens.
The Schedule Log window opens.