Tip
TipYou can search for the existing planned indirect labor transactions based on the search options available in the Advanced Search Options - Planned Indirect Labor section.
Tip
To view the Advanced Search Options - Planned Indirect Labor page, click the Advanced Search Options - Planned Indirect Labor link.
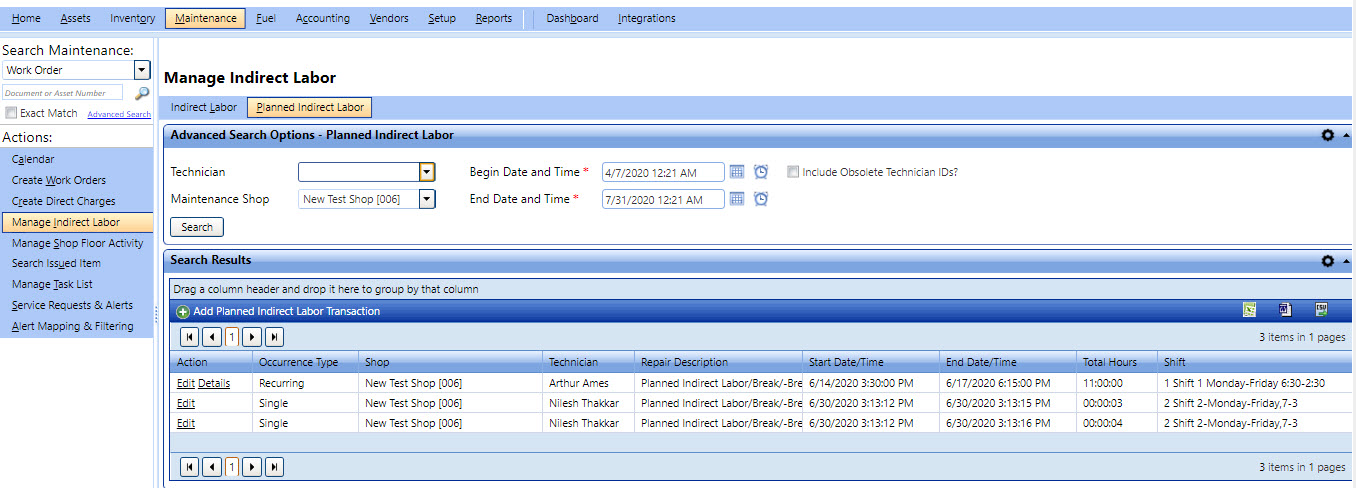
1. Click the Maintenance module.
2. In the Actions section, click Manage Indirect Labor and then click Planned Indirect Labor tab.
3. In the Advanced Search Options - Planned Indirect Labor section, specify the search following parameters:
a. In the Technician list, select a technician.
b. In the Maintenance Shop list, select a maintenance shop.
c. In the Begin Date and Time and the End Date and Time fields, type the date and time in the MM/DD/YYYY HH:MM:SS AM/PM format, or select the date from the calendar and time from the clock.
d. Optionally, select the Include Obsolete Technician IDs? check box to include the planned indirect labor transactions of the technicians who are made obsolete.
4. Click Search.
The Search Results grid displays the indirect labor transactions based on the search parameters with the following information for each transaction:
§ Repair Description
§ Occurrence Type
§ Shop
§ Technician
§ Repair Description
§ Start Date/ Time
§ End Date/ Time
§ Total Hours
§ Shift
5. In the Search Results grid, verify the information of the planned indirect labor, and in the Actions column, do the following
Click Edit, if you want to edit the selected planned indirect labor details.
Click Details, if you want to view the details of the selected planned indirect labor such as start and end dates and time, total hours of the planned indirect labor.
You can export the Search Results grid in the following formats:
· Microsoft Excel (.xlsx)
· Microsoft Word (.docx)
· Comma-Separated Values (.csv)
1. Click the Microsoft Excel ( ![]() ), Microsoft Word (
), Microsoft Word (  ), or Comma-Separate Value (
  ) icon in the upper-right corner of the Search Results grid.
The File Download dialog box opens prompting you to Open, Save, or Cancel.
2. Click Save.
The Save As dialog box is displayed with the File Type of the selected format.
3. Browse to the desired location, specify a file name, and then click Save.
The Search Results grid is saved in the specified format at the specified location.