Tip
TipThe Currently Assigned tab lets you to check or edit the details of currently assigned asset to the selected repair.
Tip
To view the Currently Assigned tab, click the Currently Assigned link.
1. Search and view the pending repair.
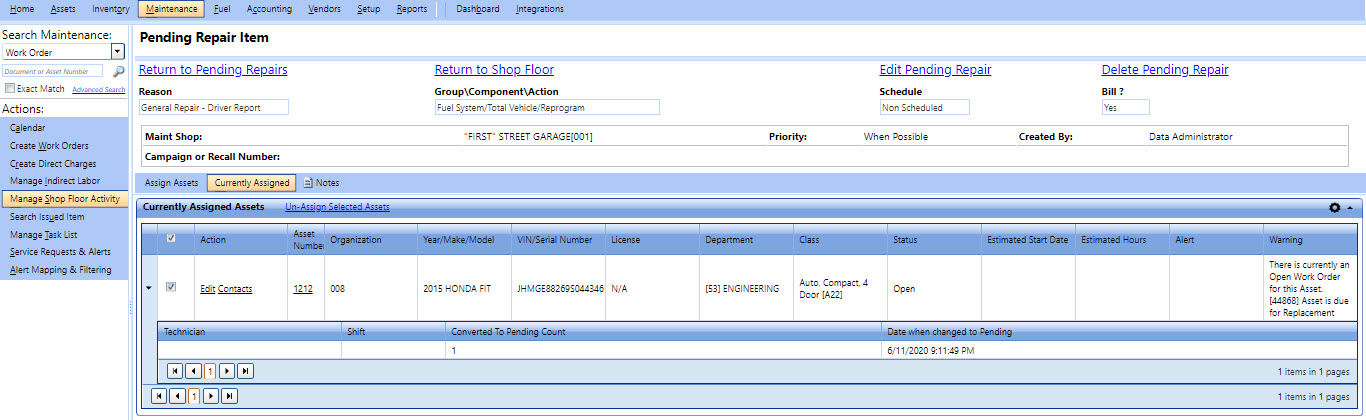
2. The Pending Repair Item page displays the details of the selected repair along with the assets assigned to the pending repair in the Currently Assigned tab.
3. In the Currently Assigned Assets grid, verify the details of currently assigned asset in all the columns and do the following:
a. In the Action column, click Edit, if you want to edit details of the specific assigned asset.
The Pending Repair Details dialog box opens.
b. In the Pending Repair Details dialog box, make desired changes and click Save.
c. In the Action column, click Contacts, if you want to view the contact details for the selected repair.
The Contact Details dialog box opens where you can check the contact details of the person such as name, role, phone, email ID to contact for the repair.
d. In the Asset Number column, click asset number to open the respective Assets page to view the asset details.
e. Click ![]() next to the selected currently assigned asset to view other details of the asset such as technician, shift, converted to pending count, date when the repair changed to pending.
next to the selected currently assigned asset to view other details of the asset such as technician, shift, converted to pending count, date when the repair changed to pending.
|
Note: The Converted to Pending Count column displays the number of times a repair is converted to pending repair. This helps the Shop Floor Managers prioritize the repair task. |
4. Click Un-Assign Selected Assets, if you want to un- assign the selected asset from the pending repair.
|
Note: On the Pending Repair Item page, you can:
|