Tip
TipThe search functionality helps you to find paid and unpaid invoices in FASTER Web. The Search Results section display records based on the search values provided in the Search Option Payables section.
Tip
To view the Search Options - Payables page, click the Search Options - Payables link.
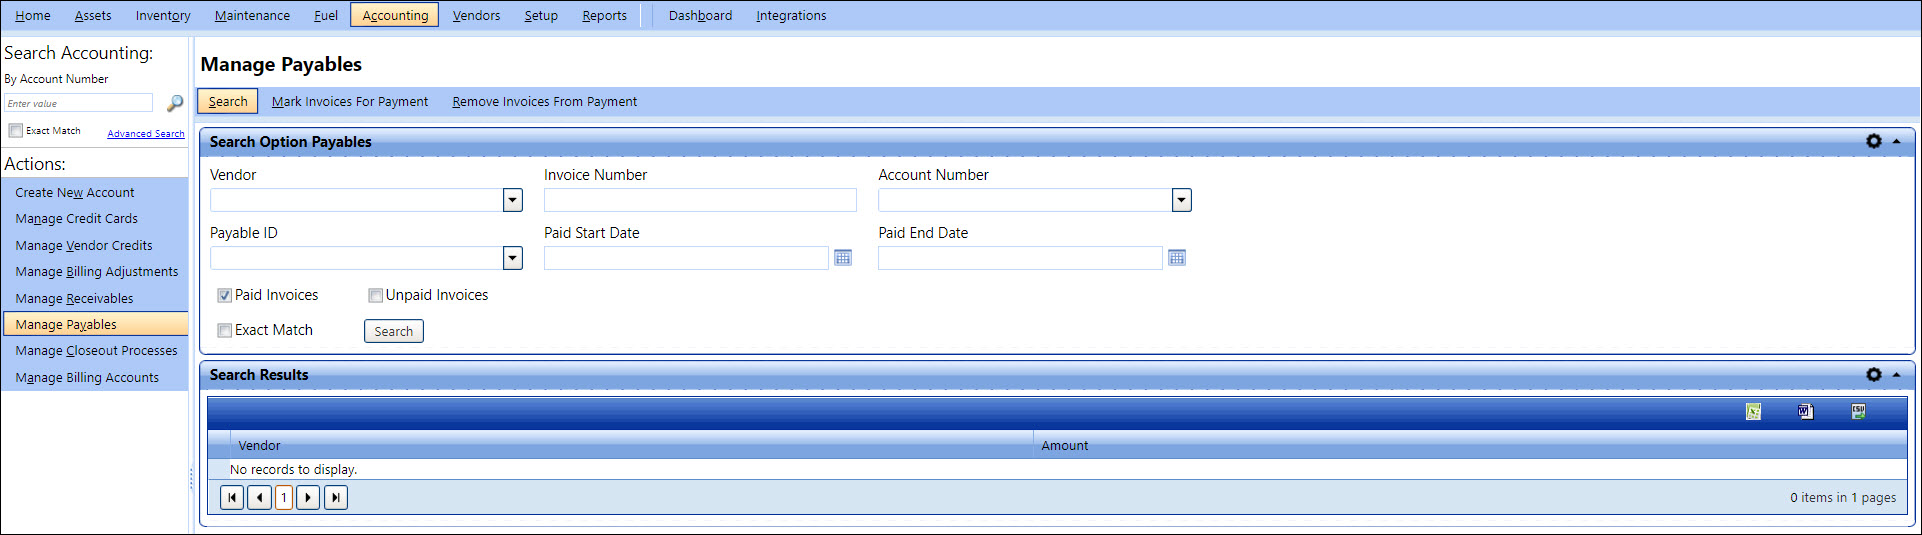
1. Click the Accounting module.
2. In the Actions section, click Manage Payables.
3. In the Search Option Payables section, you can perform one of the following:
a. Click the Paid Invoices check box and specify the following search parameters:
i. In the Vendor list, select a vendor.
ii. In the Invoice Number box, type an invoice number.
iii. In the Account Number list, select an account number.
iv. In the Payable ID list, select a payable ID.
v. In the Paid Start Date field, type the date in the MM/DD/YYYY format or select a start date of payable transaction duration.
vi. In the Paid End Date field, type the date in the MM/DD/YYYY format or select a end date of payable transaction duration.
b. Click the Unpaid Invoices check box and specify the following search parameters:
i. In the Vendor list, select a vendor.
ii. In the Invoice Number box, type an invoice number.
iii. In the Account Number list, select an account number.
4. Optionally, if you know the exact account number, select the Exact Match check box to exactly match the search result with the search parameters.
5. Click Search.
The Search Results grid displays the payables transactions based on the search parameters with the following information for each transaction:
§ Vendor
§ Amount
6. Click ![]() next to a vendor to view invoice.
next to a vendor to view invoice.
7. Click ![]() next to an invoice to view invoice details.
next to an invoice to view invoice details.
|
Navigation Tips:
|
You can export the Search Results grid in the following formats:
· Microsoft Excel (.xlsx)
· Microsoft Word (.docx)
· Comma-Separated Values (.csv)
1. Click the Microsoft Excel ( ![]() ), Microsoft Word (
), Microsoft Word (  ), or Comma-Separate Value (
  ) icon in the upper-right corner of the Search Results grid.
The File Download dialog box opens prompting you to Open, Save, or Cancel.
2. Click Save.
The Save As dialog box is displayed with the File Type of the selected format.
3. Browse to the desired location, specify a file name, and then click Save.
The Search Results grid is saved in the specified format at the specified location.