Tip
TipFrom the Step 1: Select Reports and Scripts page, you can select the required script files to be executed and custom report files to be deployed, and also provide credentials to connect to the Report server.
Tip
The Standard window opens.
The Custom Report Deployment - Step 1: Select Reports and Scripts page opens.
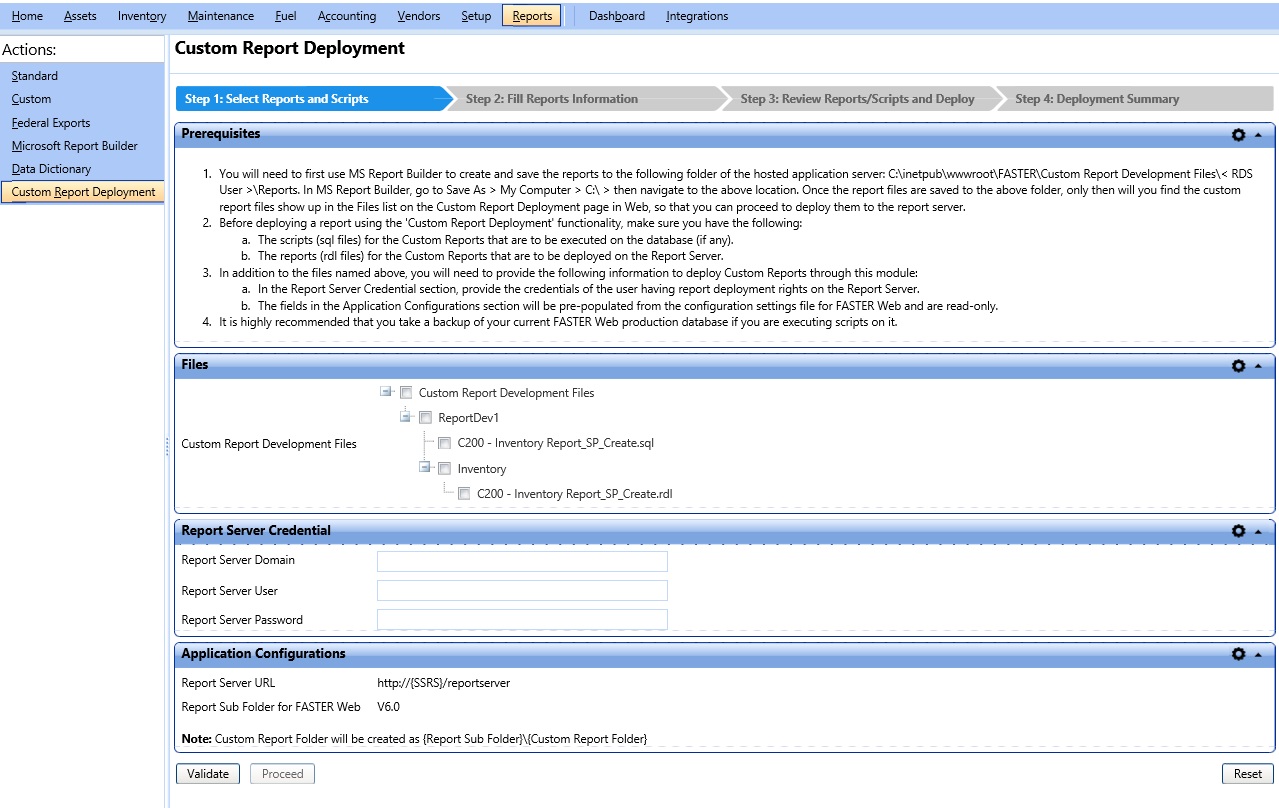
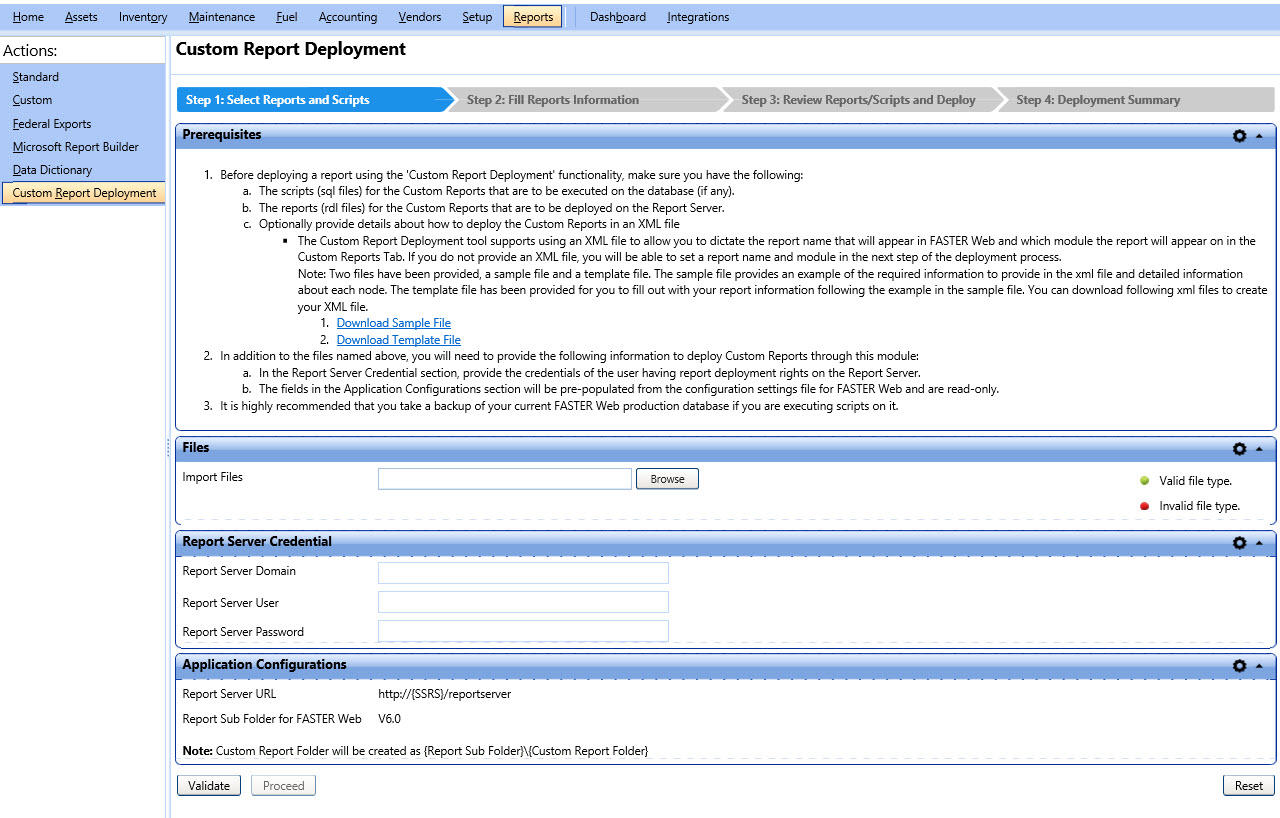
Note: The Files section is displayed as per the Microsoft Report Builder hosting scenario value selected in the Setup > Reports Settings > Edit Custom Reports and BI Access Settings.
a. If the Microsoft Report Builder application is installed on the FASTER Web application server, do the following:
i. Click  next to the Custom Report Development Files.
The Custom Report Folder tree view is displayed.
ii. In the Custom Report Folder tree, click the following check box (es):
o A single folder or multiple folders containing .sql files (scripts) and .rdl files.
o A single or multiple .sql files (scripts) of the custom reports that you want to execute on the FASTER Web database.
o A single or multiple .rdl files of the custom reports that you want to deploy on the report server.
Note: If the Custom Report Development Files folder does not contain any .rdl files or .sql files, an error message is displayed, and a Validate button is disabled.
b. If the Microsoft Report Builder application is installed on individual client machine, do the following:
§ In the Files section, click Browse and select any of the following files:
o A single or multiple .sql files (scripts) of the custom reports that you want to execute on the FASTER Web database.
o A single or multiple .rdl files of the custom reports that you want to deploy on the report server.
o The CustomReports.xml file that contains the custom report’s folder format. This file is optional.
|
Note:
|
FASTER Web validates the specified information and checks whether the Custom Report folder exists inside the Report Sub folder. If the Custom Report folder does not exist, a folder {Report Sub Folder}\ {Custom Report Folder} is created.
|
Note: To clear the files selection, click the Reset button. |
Click the Proceed button to go to the Step 2: Fill Reports Information page.