Map the Lightweight Directory Access Protocol (LDAP) attributes to claims. Based on this mapping, the AD FS claims mapping is done that is used for the authentication.
Enable the Cross Origin Resource Sharing (CORS) and set the origin (domain) on AD FS to allow a Single Page Application to access a web API with another domain.
1. Open the AD FS Management Center.
2. In the left pane, click AD FS > Application Groups.
The Application Groups pane opens.

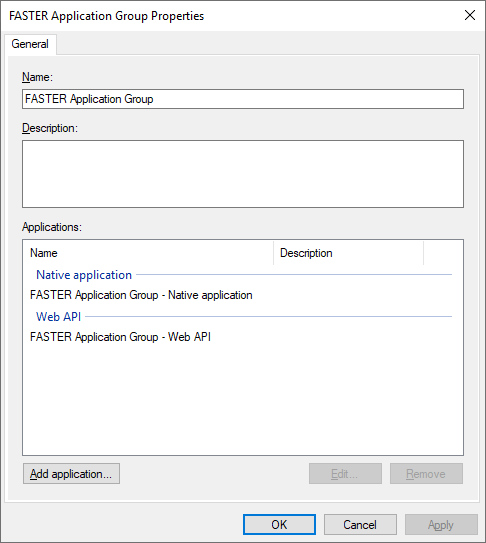
3. In the Application Groups, right-click the created application group and click Properties.
The Application Groups Properties dialog box opens.

4. Select application under Web API and click on Edit.
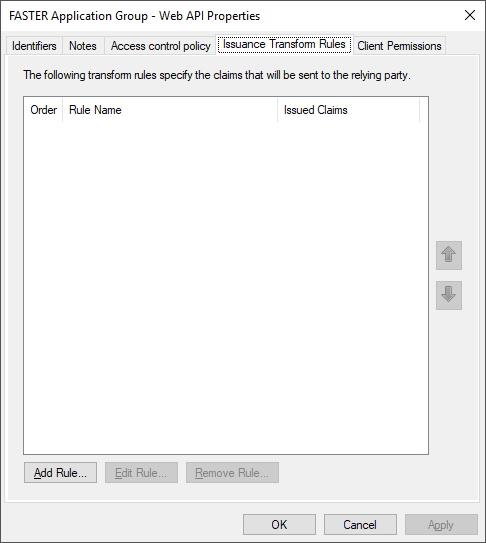
The Application Group – Web API Properties dialog box opens.

5. In Application Group – Web API Properties dialog box, clicks on Issuance Transform Rules tab and click Add Rule.
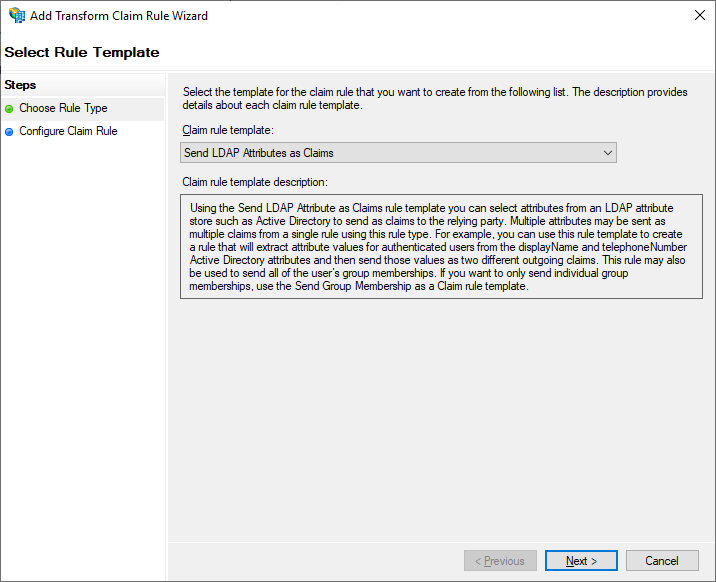
The Add Transform Claim Rule Wizard screen opens.

6. In Add Transform Claim Rule Wizard screen, Select Send LDAP Attributes as Claims and click Next.

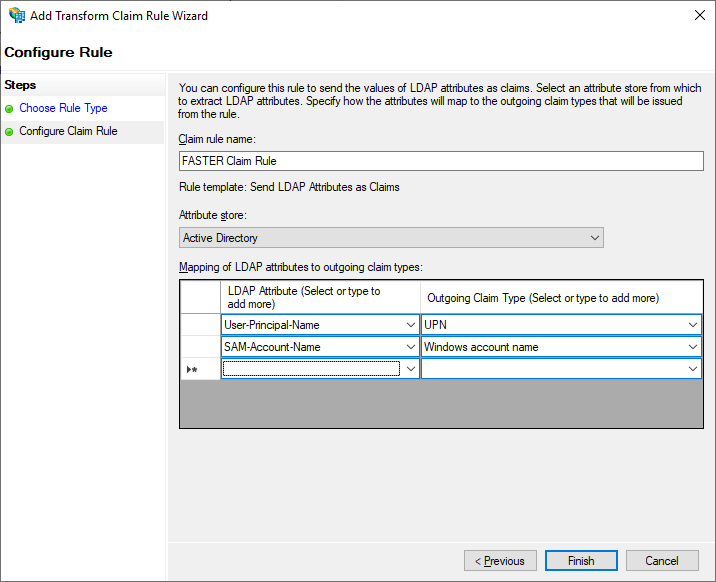
7. Type a Claim rule name, for example, FASTER Claim Rule.
8. Select Attribute store as Active Directory.
9. Select and map LDAP Attributes listed below.
|
LDAP Attribute |
Outgoing Claim Type |
|
User-Principal-Name |
UPN |
|
SAM-Account-Name |
Windows account name |

10. Click Finish.
11. In the Edit Claim Issuance Policy dialog box, click Apply and then click OK.
12. In Application Group – Web API Properties dialog box, click Apply and OK.
13. In Application Group Properties dialog box, click OK.
Use the related PowerShell Commandlet to run the commands to enable CORS.
Open PowerShell Commandlet as Admin.
Execute below commands one by one.
Set-AdfsProperties -EnableIdPInitiatedSignonPage $true
Set-AdfsResponseHeaders -EnableCORS $true
Set-AdfsResponseHeaders -SetHeaderName "X-Frame-Options" -SetHeaderValue "allow-from *"
Set-AdfsResponseHeaders -SetHeaderName "Access-Control-Allow-Headers" -SetHeaderValue "x-ms-lib-capability, x-client-sku, x-client-VER, x-client-OS, x-client-CPU, x-client-current-telemetry, x-client-last-telemetry, x-client-os, authorization, AuthMode, Content-Type"
Set-AdfsResponseHeaders -CORSTrustedOrigins https://[yoursite]
Set-AdfsResponseHeaders -SetHeaderName "Access-Control-Allow-Origin" -SetHeaderValue https://[yoursite]
Note: To run last two commands in the above command list, make sure that you have set the value such as URL name added in the AD FS FASTER Host Name (with scheme) in the Authentication Settings, for example: https://[yoursite]. Refer Step 3: Configuring FASTER Web Application to use AD FS Authentication for information.